
최종 생성 아키텍처
1) VPC 생성
- VPC 대역은 10.1.0.0/16 사용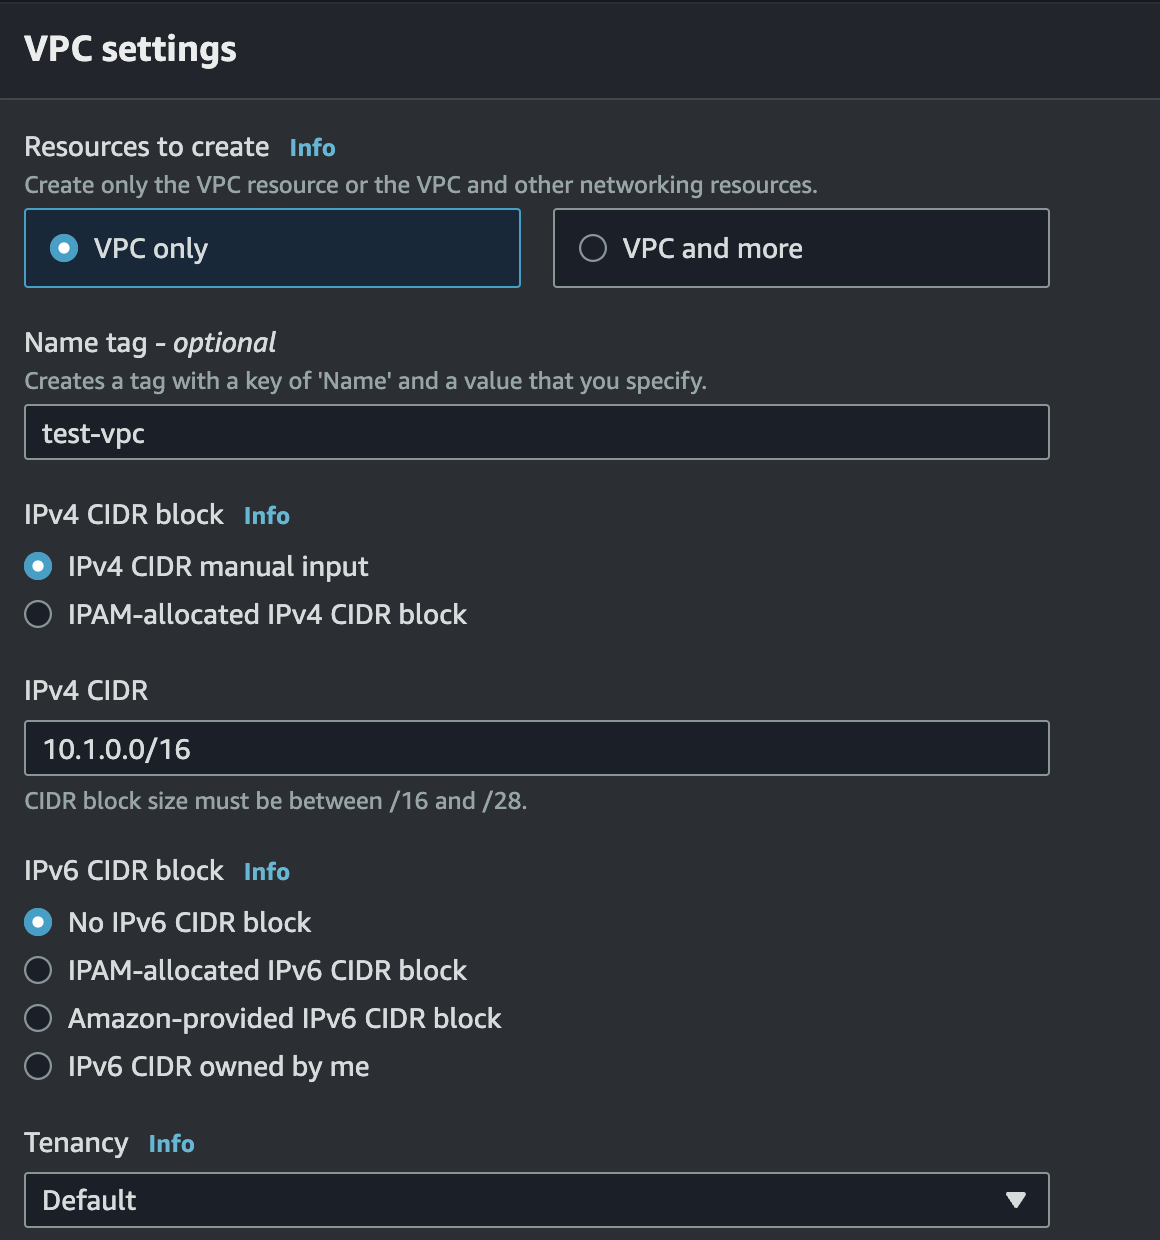
2) Subnet 생성
- public subnet : 10.1.100.0/24

- private subnet : 10.1.200.0/24
참고로 다음과 같은 Ip는 사용할 수 없다.
- x.x.x.0 - network id
- x.x.x.1 - gateway
- x.x.x.2 - DNS
- x.x.x.3 - Reserved
- x.x.x.255 - Boradcast
public은 외부 통신을 해줄것 이므로
edit subnet settings -> auto-assign IP settings를 체크해준다.
3) Routing Table 생성
private routing table과 public routing table에 각각 10.10.0.0/16 (vpc)의 target : local이 있으면 통신이 서로 가능

Destination의 local로 되어있는 ip안에 새로운 ip가 추가될 경우 target (해당 vpc)로 트래픽을 넘긴다.
- my-vpc-01-private-route
public vpc에서 명시적 라우팅 테이블(subnet associations)을 public routing table 등록
private vpc에서 명시적 라우팅 테이블(subnet associations)을 private routing table 등록
4) IGW 생성
인터넷과 통신하기위해 필요한 IGW이다.
<IGW>
my-vpc-01-igw

<public subnet routing table>
10.1.0.0/16 -> local
0.0.0.0/0 -> IGW
igw 생성 이후 vpc에 연결을 진행해야 한다.
작업 -> vpc 연결
public subnet을 통해 외부와 통신할 것 이므로 public subnet routing table에만 설정해준다.
해당 라우팅 편집에 들어가 대상을 추가해준다.

5) VPC CIDR 블록 추가
vpc 생성 후 CIDR 범위 수정은 불가하나 새로운 블록을 추가할 수 있다.
vpc -> CIDR 편집 -> 추가 -> 10.20.0.0/16 추가
이런식으로 추가할 수 있다.
'Cloud Infra Architecture (AWS) > AWS ANS-C01' 카테고리의 다른 글
| 자주나오는 오답 (0) | 2023.12.02 |
|---|---|
| Transit Gateway (0) | 2023.11.29 |
| NAT Gateway (Network Address Translation) (0) | 2023.11.29 |
| EC2 Networking (0) | 2023.11.29 |
| IPv4 Address (1) | 2023.11.29 |